
Window Fabric Coordination Workflow: A Step-by-Step Guide
TL;DR:A structured window fabric coordination workflow involves defining design goals, selecting fabrics, planning hardware, and documenting specifications to create cohesive window treatments. Proper measurement, high mounting of rods, and detailed work orders prevent errors and enhance functionality and aesthetics. Accurate documentation and hardware planning are crucial to ensuring successful, consistent results in both professional and DIY projects.
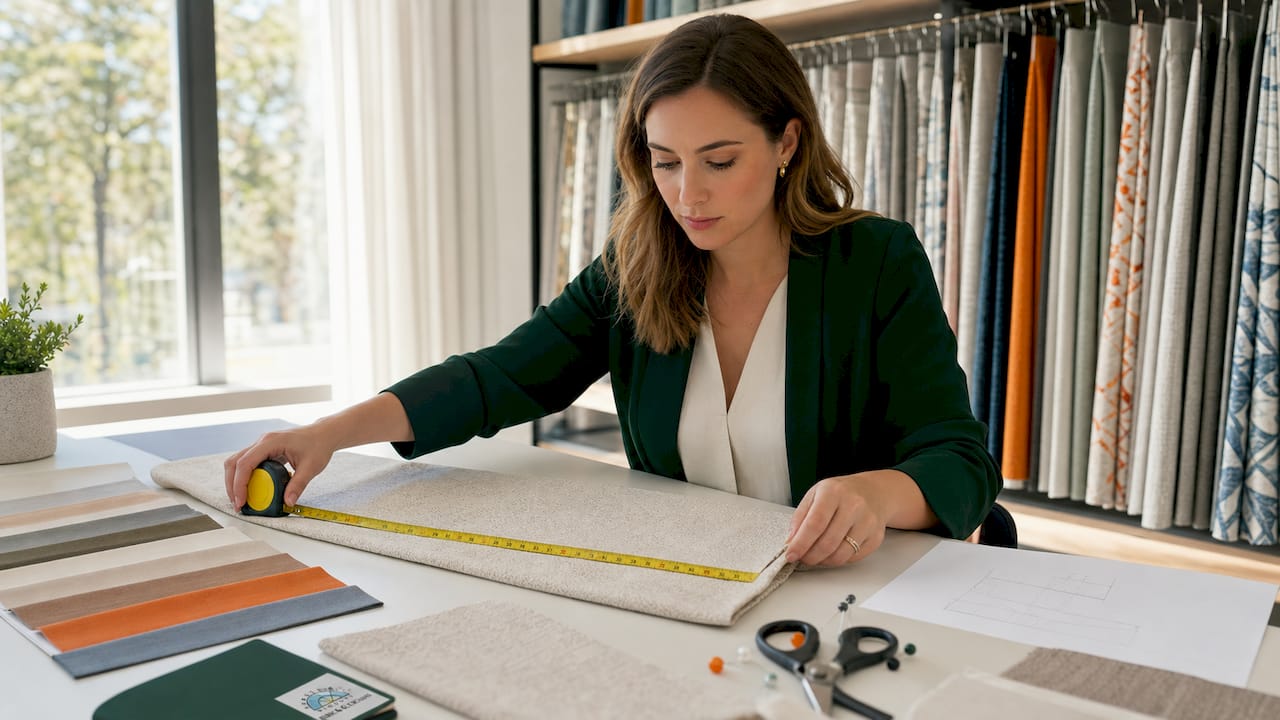
A window fabric coordination workflow is the structured process of selecting, measuring, and integrating window fabrics and treatments to create cohesive, functional, and stylish residential spaces. Interior designers call this process “window treatment coordination,” and it covers everything from your first color palette decision to the final rod installation. Without a defined process, even high-quality fabrics can produce results that feel disconnected or technically flawed. The steps below give you a reliable framework whether you are a professional designer, a homeowner managing a full renovation, or a DIY enthusiast tackling your first set of custom drapes.
What is the window fabric coordination workflow?
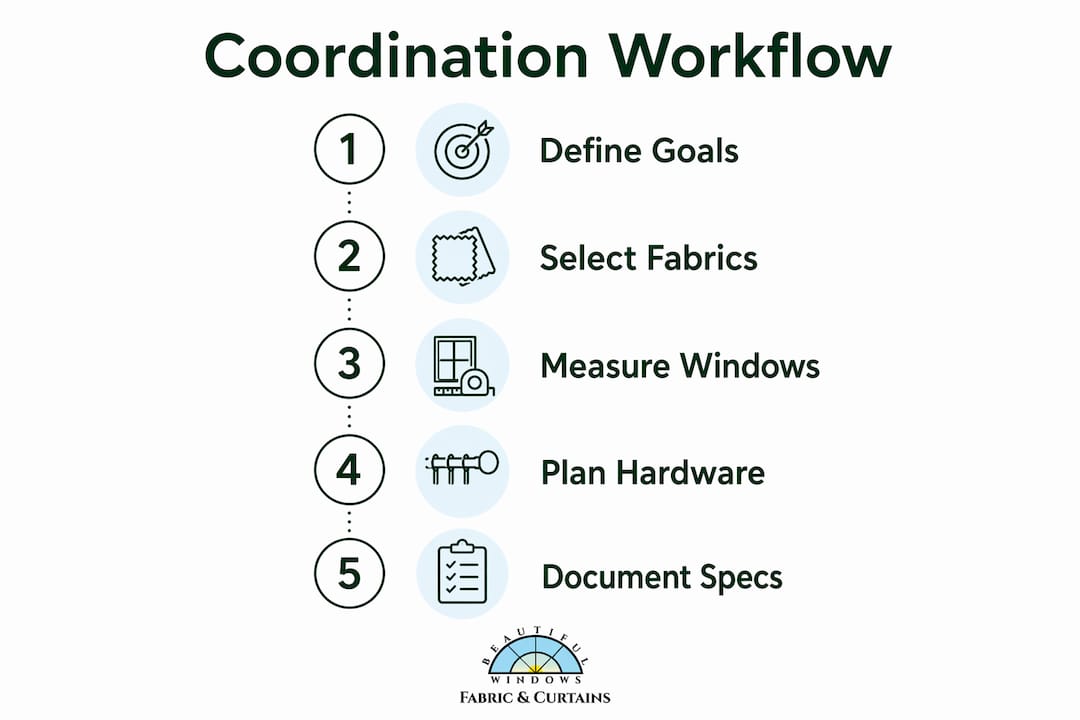
The window fabric coordination workflow is a sequential process with five core stages: goal setting, fabric selection, measurement and hardware planning, documentation, and installation. Each stage feeds directly into the next. Skipping one creates problems that compound downstream.
The process begins with defining your design intent. Are you prioritizing light control, privacy, thermal performance, or pure aesthetics? Your answer determines every fabric choice that follows. A bedroom requiring blackout performance calls for a different textile than a living room where you want soft, diffused light through linen or jacquard satin.
Once your intent is clear, the fabric selection process begins in earnest. This is where you build a color palette, identify fabric weights, and decide on treatment types such as pinch pleat panels, ripple fold drapes, or Roman shades. The final stages involve precise measurement, hardware selection, and written documentation to carry specifications from designer to fabricator to installer without error.

Pro Tip: Start every project with a written design brief, even a single paragraph. It forces clarity on goals before any fabric is ordered and gives everyone on the project a shared reference point.
How to select and coordinate fabric types, patterns, and textures
Effective fabric selection for window treatments is not about matching everything exactly. A home does not need identical curtains in every room. Instead, repeat a color palette or fabric style across rooms to create flow without monotony. This principle is the foundation of cohesive window treatment coordination across an entire residence.
Mixing patterns and textures
Designers consistently favor specific fabric pairings for layered window treatments. Popular combinations include florals with stripes, velvet with linen, and natural fabrics paired with heavier textures. These pairings work because they contrast in weight or scale while staying within a shared color family.
When designing window fabrics for multiple rooms, apply these principles:
- Scale contrast: Pair a large-scale pattern with a small-scale or solid fabric to avoid visual competition.
- Texture balance: Combine a smooth satin finish with a nubby linen or woven jacquard to add depth without clashing.
- Color repetition: Pull one accent color from your primary fabric and use it as the dominant color in an adjacent room’s treatment.
- Weight matching: Match fabric weight to the treatment style. Pinch pleats require a fabric with enough body to hold the pleat form cleanly.
Comparing fabric types for common window treatments
| Treatment Type | Best Fabric Weight | Recommended Textures |
|---|---|---|
| Pinch pleat drapes | Medium to heavy | Jacquard, velvet, embroidered |
| Ripple fold panels | Light to medium | Linen, sheer weaves, soft satin |
| Roman shades | Medium | Cotton, linen blends, woven textiles |
| Layered sheers | Light | Voile, organza, fine linen |
Pro Tip: Order fabric samples before committing to yardage. View them in the actual room at different times of day. Fabric color shifts significantly between morning and evening light.
Learning how to choose the right fabric for each treatment type saves you from costly remakes and ensures the finished panel performs as intended.
How do you measure and plan hardware placement?
Hardware placement is the most technically demanding part of textile workflow management, and it directly controls how your fabric performs. Rod height and extension guide fabric stacking and drapery break points. You must design your fabric cut lengths around the installed rod position, not independently of it.
Standard rod placement guidelines
Industry guidelines recommend mounting rods 4–6 inches above the window frame and extending them 3–6 inches past each side of the frame. For rooms where maximum light exposure is the goal, extensions of 8–12 inches allow panels to stack fully off the glass. That stack-back distance is what separates a window that feels open and airy from one that feels blocked even when the drapes are pulled back.
Follow these measurement steps for accurate results:
- Measure from the planned rod position to the floor, then add 0.5–1 inch for a slight floor break or 1–2 inches for a puddle effect.
- Calculate stack-back width by multiplying the fabric fullness ratio (typically 2x to 2.5x the window width) by the fabric panel width.
- Confirm the rod extension accommodates the full stack without covering the glass when panels are open.
- Use a stud finder to locate solid mounting points and a spirit level to keep the rod perfectly horizontal.
A common mistake is setting the rod too close to the window frame. This compresses the fabric stack onto the glass and makes even a well-made panel look crowded. The measurement standards used by professional workrooms account for stack-back from the start of the design process, not as an afterthought.
Pro Tip: Mark your rod bracket positions with painter’s tape before drilling. Step back and view the placement from across the room. Adjusting tape costs nothing; adjusting holes in drywall costs time and money.
What documentation methods keep a project on track?
Drapery projects fail most often because of verbal agreements that cause specification drift. Recording pleat depth, pattern matching, and trim placement in a written work order before cutting fabric is the single most effective way to prevent costly errors. This applies equally to a professional workroom handling 20 panels and a DIY homeowner making two.
What a drapery work order should contain
A drapery work order template captures measurements, fabric details, and special instructions so that multiple people can follow the same specifications without ambiguity. A complete work order includes:
- Client name, room, and window label (e.g., “Living Room, East Wall, Window 1”)
- Finished width and finished length per panel
- Fabric name, vendor, colorway, and yardage per panel
- Pleat style, pleat depth, and spacing
- Pattern repeat and matching instructions (e.g., “center motif at eye level”)
- Lining and interlining specifications
- Hardware details including rod diameter, bracket type, and ring style
- Trim placement and attachment method
- Installation notes including floor clearance and break style
This level of detail protects everyone involved. The designer’s intent is preserved. The fabricator has no room for guesswork. The installer knows exactly where the rod goes before arriving on site. For DIY projects, a completed work order also serves as a personal checklist that prevents you from cutting fabric before confirming every measurement.
The custom drapery workflow used by professional workrooms follows this documentation structure from intake to delivery, which is why professionally made panels consistently outperform self-managed projects that rely on memory and informal notes.
What are common mistakes in window fabric coordination?
The most frequent errors in window treatment coordination fall into four categories: mismatched patterns, poor rod placement, missing documentation, and overlooked functional needs.
- Pattern mismatch: Combining two large-scale patterns in the same room creates visual noise. The fix is to limit bold patterns to one focal window and use solids or subtle textures elsewhere.
- Rod placed too low: A rod mounted at the top of the window frame rather than 4–6 inches above it makes ceilings feel lower and compresses the fabric. Always mount high.
- Skipping the work order: Verbal instructions between designer and fabricator lead to panels cut at the wrong length or with the wrong pleat depth. Structured QA workflows in professional window covering production include photographic evidence at each stage to verify fabric alignment and specifications.
- Ignoring daily use: Drapes that look beautiful but are difficult to open and close, or that block a door swing, fail the functional test. Measure furniture clearance and traffic paths before finalizing panel width and stack-back placement.
“The best-looking drapes in the world are a failure if the homeowner never opens them because they’re too heavy or awkward to operate.”
Pro Tip: Before finalizing any fabric order, walk through the room and simulate how you will use the window every day. That single exercise catches more functional problems than any design review.
Key takeaways
A successful window fabric coordination workflow requires defined goals, documented specifications, and hardware placement decisions made before fabric is cut.
| Point | Details |
|---|---|
| Start with design intent | Define light control, privacy, and aesthetic goals before selecting any fabric. |
| Repeat, do not match | Use a shared color palette or fabric style across rooms rather than identical treatments. |
| Mount rods high and wide | Place rods 4–6 inches above the frame and extend 3–6 inches past each side for proper stack-back. |
| Document every specification | A written work order prevents specification drift and protects all parties from costly errors. |
| Test fabric in the actual space | View samples in the room at multiple times of day before committing to yardage. |
Why i think most people underestimate documentation
Working with fabric and window treatments over many years, the single biggest source of project failures is not poor taste or wrong fabric choices. It is the absence of written specifications. Designers and homeowners alike tend to trust their memory or a quick text message to carry critical details from one stage to the next. That works until it does not, and when it fails, it fails expensively.
The drapery work order is not a bureaucratic formality. It is the document that makes a beautiful result repeatable and verifiable. When a fabricator receives a panel back from a client claiming it is the wrong length, the work order is what resolves the dispute in minutes rather than weeks. For DIY enthusiasts, writing down every measurement and fabric specification before touching scissors is the equivalent of measuring twice and cutting once.
The other thing most guides understate is the relationship between hardware and fabric. Designers often select fabric first and treat rod placement as a finishing detail. That sequence produces panels that look slightly off without anyone being able to say exactly why. The rod position determines the fabric length, the stack-back, and the visual weight of the entire treatment. Plan hardware first, then design the fabric around it. The results are noticeably better, and the drapery workroom timeline runs more smoothly when fabricators receive hardware specs alongside fabric specs from the start.
— Marrion
Start your next project with the right fabrics
Beautifulwindowselgin offers a curated collection of designer drapery fabrics including jacquard satin, embroidered textiles, and upholstery-grade weaves sold by the yard, with nationwide shipping from Columbia, SC. Every fabric in the collection is selected for drapery performance, meaning the weight, drape, and finish are appropriate for the treatment types described in this guide.
For projects requiring precise specification accuracy, Beautifulwindowselgin provides custom drapery services with professional consultation and installation guidance. Whether you are ordering fabric samples to test in your space or booking a full custom project, the team at Beautifulwindowselgin supports every stage of your window treatment coordination process with reliable expertise and quality materials.
FAQ
What is a window fabric coordination workflow?
A window fabric coordination workflow is the structured process of defining design goals, selecting complementary fabrics, planning hardware placement, and documenting specifications to produce cohesive, functional window treatments. It applies to both professional design projects and DIY residential installations.
How far above the window should curtain rods be mounted?
Rods should be mounted 4–6 inches above the window frame, with extensions of 3–6 inches past each side. For maximum stack-back and light exposure, extensions of 8–12 inches are recommended.
Why is a drapery work order necessary?
A drapery work order documents pleat depth, fabric details, pattern matching, and trim placement so fabricators and installers follow the same specifications. Without it, verbal instructions cause errors that result in panels cut at the wrong length or with incorrect construction details.
How do you coordinate fabrics across multiple rooms?
Repeat a shared color palette or fabric style rather than using identical treatments in every room. Combining florals with stripes or velvet with linen within a consistent color family creates visual flow without uniformity.
What is the most common hardware mistake in window treatment installation?
Mounting the rod at the top of the window frame rather than 4–6 inches above it is the most common error. This placement compresses the fabric stack onto the glass and makes ceiling heights appear lower than they are.
Recommended
- Drapery Fabric Selection Guide for Custom Window Treatments – Shop Designer Fabrics by the Yard | Curtains & Drapery
- Curtain Fabric Selection Guide 2026: Pick Styles That Last 30% Longer – Designer Fabrics by the Yard | Drapery Making Services
- 7 Essential Window Treatment Fabric Tips for Homeowners – Shop Designer Fabrics by the Yard | Curtains & Drapery
- DIY Custom Window Treatments: Step-by-Step Guide – Fabric Store in Columbia, SC | Drapery Making Services