
Readymade Curtain Hanging Workflow: A Practical Guide
TL;DR:Proper planning and precise measurement are essential for achieving polished curtain installations that look professional and feel proportionate.Using level tools, wall anchors, and correct hardware ensures the brackets are aligned and securely mounted, preventing crooked or sagging curtains.Following a structured workflow from measurement through styling guarantees consistently beautiful results, whether renting or owning.
Most curtains end up looking flat, crooked, or bunched at the wrong height because the hanging process was treated as an afterthought. A well-executed readymade curtain hanging workflow, which is the industry term for the structured sequence of measuring, mounting, and finishing your window treatments, prevents exactly that. This guide walks you through every stage of the curtain installation process: from gathering the right tools to making final styling adjustments. Whether you own your home or rent, you will leave with a clear, repeatable method that produces polished results every time.
Table of Contents
- Key takeaways
- The readymade curtain hanging workflow: tools and prep
- Step-by-step curtain installation process
- Common mistakes in curtain hanging and how to fix them
- Finishing touches and long-term curtain care
- My honest take on getting curtain hanging right
- Upgrade your window treatments with Beautifulwindowselgin
- FAQ
Key takeaways
| Point | Details |
|---|---|
| Measure before you drill | Record window width and height precisely; add 16–20 inches to window width for rod length. |
| Mount the rod higher than you think | Hang brackets 4–6 inches above the window frame to make ceilings feel taller. |
| Use anchors on drywall | Drywall without a stud will not hold bracket screws alone; wall anchors prevent pullout. |
| Renters have a reliable option | Tension rods with a 3-inch fabric fold-over allowance deliver a clean look without drilling. |
| Finish with a level check | Confirm evenness with a level and test curtain movement before calling the job done. |
The readymade curtain hanging workflow: tools and prep
In the trades, this stage is called pre-installation planning. Before a single bracket goes into the wall, having the right materials on hand is the difference between a one-trip job and three frustrated trips to the hardware store.
Tools and materials you need
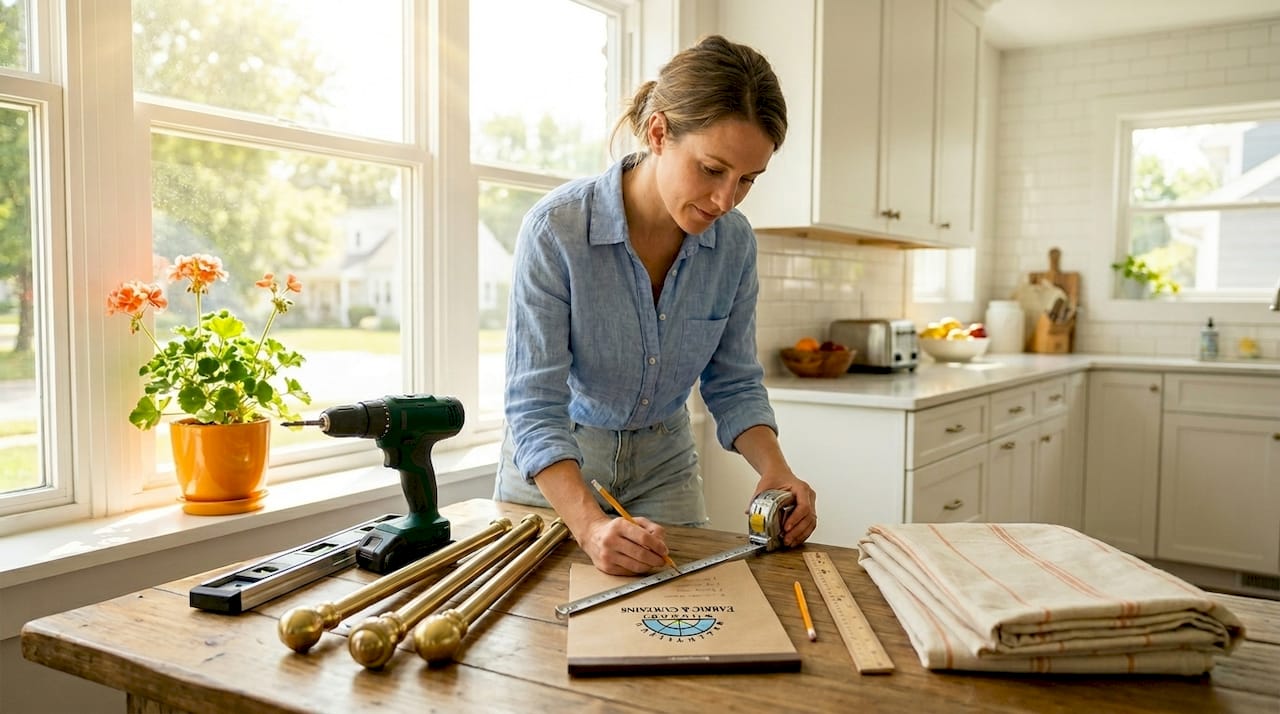
Essential tools for a standard curtain installation process include:
- Drill with a Phillips head and masonry bit
- Level (a 24-inch torpedo level works well for this task)
- Tape measure
- Pencil for marking bracket positions
- Screwdriver
- Curtain rod kit with matching brackets
- Wall anchors sized to your bracket hardware
- Step stool or ladder
If you are a renter, add a tension rod to that list. Tension rods require at least a 3-inch fold-over allowance on the fabric to hang properly, so confirm that your curtain panels have enough header fabric before committing to this method.
Measuring the window and choosing your rod
Accurate measurement is the foundation of the entire curtain setup guide. Measure your window’s width at the widest point, then calculate rod length by adding 16 to 20 inches total. That accounts for 8–10 inches past each side of the window, which lets curtains stack cleanly off the glass when open. For height, measure from where you plan to mount the rod down to your desired curtain drop, whether that is the sill, below the apron, or the floor.
Pro Tip: Before purchasing your rod, confirm it is rated for the weight of your fabric. Heavier materials like jacquard or lined panels require thicker rods and reinforced brackets to stay level over time.
| Tool or item | Purpose | Renter alternative |
|---|---|---|
| Drill and bits | Installing brackets into wall or studs | Tension rod (no holes needed) |
| Level | Verifying bracket alignment | Smartphone level app |
| Wall anchors | Securing brackets in drywall | Adhesive no-drill brackets |
| Tape measure | Window and rod length measurements | Same; no substitute |
| Curtain rod kit | Supporting fabric panels | Spring-tension rod for light panels |
Understanding how to choose readymade curtains before you shop also saves time at this stage. Panel width, header style, and lining weight all influence which hardware you select.
Step-by-step curtain installation process
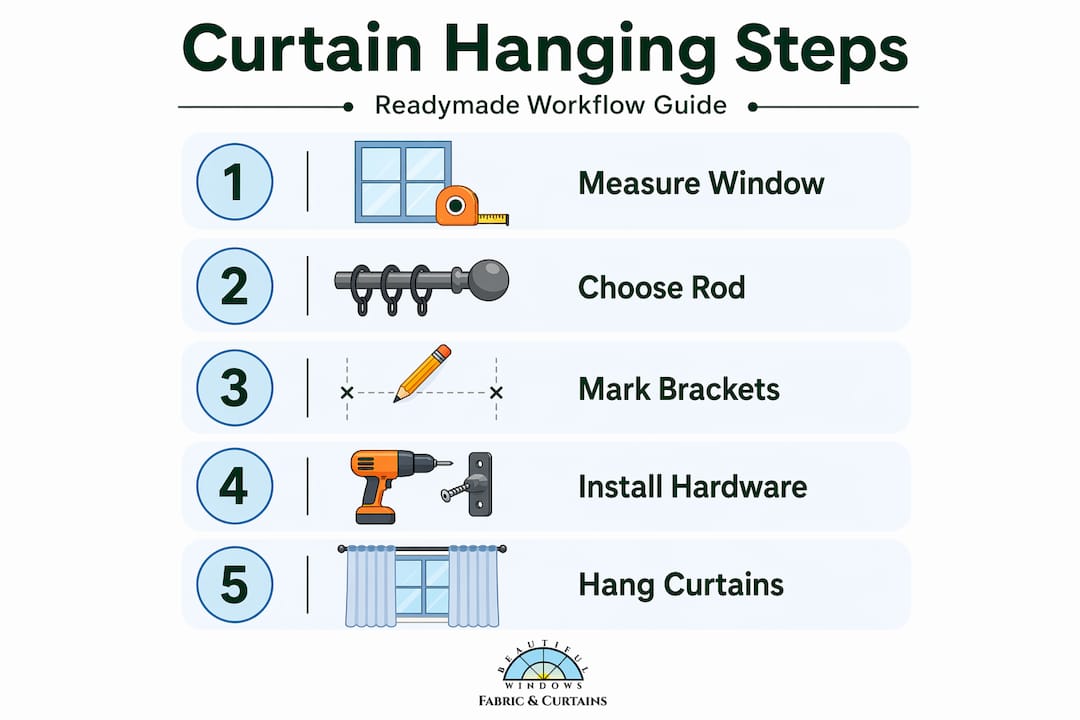
This is where preparation converts into visible results. Work through these steps in order. Skipping ahead to hang the rod before the brackets are correctly positioned is the most common source of rework.
- Mark your bracket height. Measure up from the top of the window frame 4 to 6 inches and mark lightly with a pencil. Mounting the rod at this height makes rooms feel taller and windows appear larger. Mark both sides of the window at the same height.
- Mark bracket positions horizontally. From the window edge, measure out 8 to 10 inches on each side and mark where the bracket center will sit. Use your level to connect both marks with a faint horizontal reference line. This single step prevents crooked curtains entirely.
- Locate studs or plan for anchors. Run a stud finder across your marks. If a stud falls within an inch of your bracket mark, adjust slightly and screw directly into the stud. If no stud is available, use wall anchors designed for your bracket hardware weight to prevent pullout from drywall over time.
- Drill pilot holes. Drill pilot holes at each marked position before inserting anchors. On standard drywall, a 3/16-inch bit creates a clean channel for the anchor without crumbling the surrounding surface.
- Install the brackets. Tap anchors gently into the pilot holes, then drive bracket screws until snug. Do not overtighten, as this can strip anchors out of drywall. Check each bracket independently with your level before moving on.
- Thread the curtains onto the rod. Slide ring clips, grommets, or rod pockets onto the rod while it is still off the wall. Distribute the fabric evenly across the rod so pleating or gathers are balanced. For panels with pinch pleats, attach drapery hooks to the pleat tape before loading onto rings.
- Mount the rod onto the brackets. Set the rod into the bracket cradles and secure any locking screws. For rods spanning over 48 inches, add a center support bracket before this step to prevent sagging over time.
- Verify level and test movement. Lay your level across the top of the rod and confirm it reads even. Then open and close the curtains several times to confirm the panels glide smoothly without catching on hardware or bunching unevenly.
Pro Tip: Take a photo of the wall before drilling. If you need to patch and repaint later, the photo shows exactly where anchors were placed so you do not miss spots during repair.
For renters following a no-drill path, the workflow from steps 1 through 5 is replaced by fitting a tension rod snugly inside the window recess or extending it to the wall width. The threading and finishing steps remain identical.
Common mistakes in curtain hanging and how to fix them
Even experienced DIYers fall into predictable traps. Recognizing these before you start is far more efficient than fixing them after the rod is mounted.
Hanging curtains too low is the single most common error. It compresses the apparent ceiling height and makes the room feel smaller. If you have already installed brackets too low, the fix is straightforward. Fill the old holes with spackle, let it dry, sand lightly, and remount at the correct height above the frame.
Uneven brackets are the second most reported issue. This happens when both sides are measured from the floor rather than from the window frame. Floor height varies slightly across most rooms. Always measure from the window trim up, not from the floor.
Here is a summary of the most frequent problems and their remedies:
| Mistake | Likely cause | Fix |
|---|---|---|
| Rod mounted too low | Measured from floor, not frame | Patch holes, remount 4–6 inches above frame |
| Crooked rod | Brackets at unequal heights | Level brackets before drilling; use reference line |
| Sagging rod center | No center support bracket | Add center bracket for spans over 48 inches |
| Curtains too narrow | Wrong rod length or panel count | Extend rod or add a third panel for fullness |
| Brackets pulling from wall | No anchors used on drywall | Remove screws, install proper anchors, reinstall |
Proper measurement discipline prevents the majority of these problems before they start. Spending five extra minutes with a tape measure saves hours of patching and repainting later.
Pro Tip when styling: The curtain stack, the fabric that sits to the side when panels are open, should cover at least half the window width on each side for a full, intentional look. If your stack barely clears the window edge, your rod is too short or your panels are too narrow.
Finishing touches and long-term curtain care
Hanging the rod correctly is only part of the result. How you dress the fabric after mounting determines whether the curtains look store-quality or casually tossed into place.
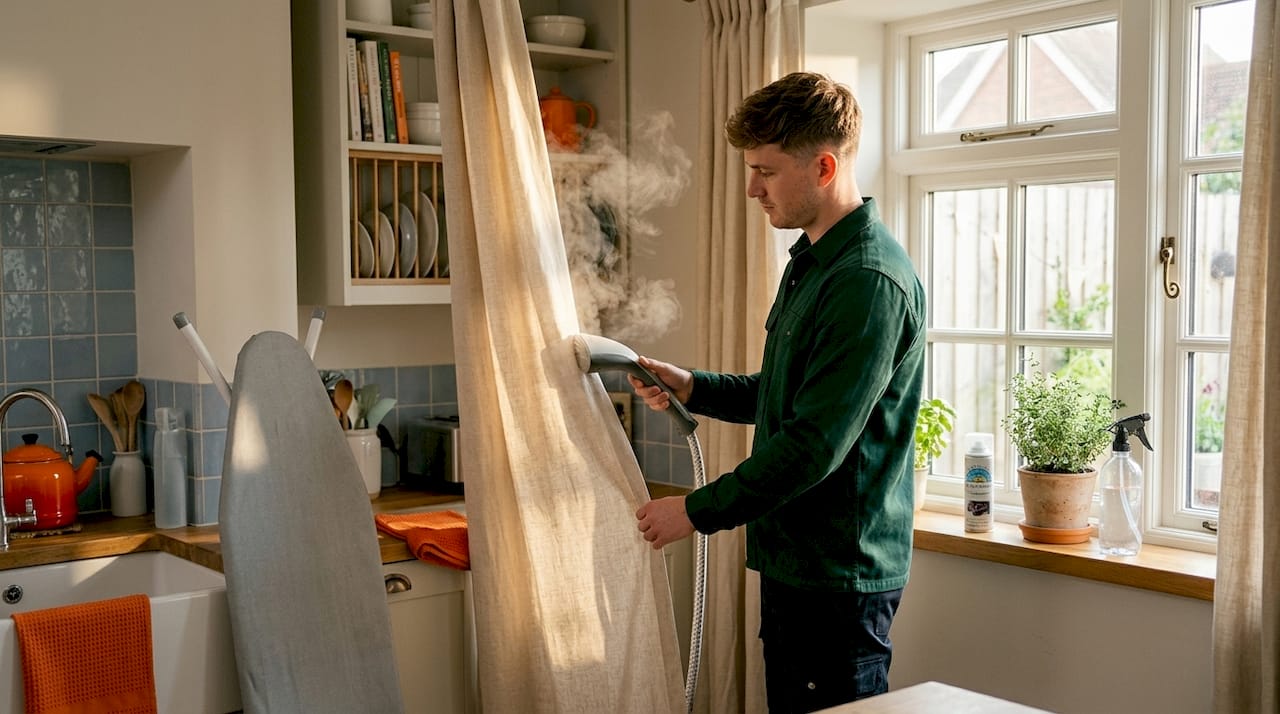
Start by steaming or ironing the panels before they go on the rod. Readymade curtains often arrive with fold creases from packaging. A garment steamer removes these in minutes without risk of fabric damage, especially on delicate weaves or satin finishes.
Once hung, train the fabric into even folds by gently smoothing the panels with your hands and then tying them loosely with a soft ribbon or fabric strip for 24 to 48 hours. This “break-in” period helps the fibers hold their drape, particularly with heavier fabrics like lined linen or jacquard blends.
A few additional care practices keep your window treatments looking refined over time:
- Vacuum curtain panels monthly using a soft brush attachment to prevent dust buildup in fabric fibers
- Rotate panels to the opposite window twice a year to even out sun exposure and fading
- Spot clean stains immediately rather than waiting for a full wash cycle; most readymade fabrics respond well to a damp cloth and mild soap
- Re-steam panels after washing since most fabrics relax back to their original shape once properly hung again
Pro Tip: Explore alternative curtain hanging styles such as back-tab, eyelet, or pleated headers before purchasing. Header style directly affects how the fabric stacks when open and how full it looks when closed.
My honest take on getting curtain hanging right
I have worked with homeowners and renters on window installations across dozens of spaces, and the pattern is consistent. When someone skips the preparation phase and goes straight to drilling, the result almost always needs correction. Not because they lacked skill, but because they lacked a clear sequence to follow.
In my experience, the leveling step is where most people cut corners. They eyeball the height instead of marking it, and then they wonder why the room still looks slightly off even with beautiful fabric. A 24-inch torpedo level costs less than a lunch out. It is worth every cent.
I have also seen renters assume tension rods are a compromise. They are not, when installed with the right curtain measurement techniques and appropriate panel weight. A properly fitted tension rod with quality fabric looks indistinguishable from a drilled installation in most rooms.
The installations that impress are always the ones where someone took thirty minutes to plan before picking up a drill. That planning compounds into results that hold up for years. The workflow is not complicated. It is just a series of patient, precise steps done in the right order.
— Marrion
Upgrade your window treatments with Beautifulwindowselgin
Beautifulwindowselgin offers premium materials and professional services that complement every stage of your curtain installation.
Whether you are selecting fabric for a new set of panels or need expert guidance on sizing, Beautifulwindowselgin brings precision and quality to the process. The curated collection of designer drapery fabrics includes jacquard satin, embroidered weaves, and structured upholstery textiles sold by the yard, all suited to ready-to-hang and custom drapery projects. For homeowners who want a guaranteed fit, the professional measurement service provides precise window assessments that eliminate guesswork before a single bracket goes into the wall. Nationwide shipping makes quality accessible regardless of location. Beautifulwindowselgin also carries upholstery and drapery fabric options for coordinating your full interior scheme with confidence.
FAQ
How high should curtain rod brackets be mounted?
Mount brackets 4 to 6 inches above the window frame. This height makes ceilings appear taller and gives the room a more polished, proportional look.
Do I need wall anchors for curtain rod brackets?
Yes, when drilling into drywall without hitting a stud, wall anchors are necessary. Without them, brackets can pull free under the weight of curtain fabric over time.
What is the right rod length for readymade curtains?
Add 16 to 20 inches to your window’s width. That extension places each bracket 8 to 10 inches beyond the window edge, allowing panels to clear the glass when open.
Can renters hang curtains without drilling?
Yes. Tension rods work well for light to medium-weight panels as long as the fabric header includes at least a 3-inch fold-over allowance. No-drill adhesive brackets are another option for slightly heavier panels.
How do you keep readymade curtains from looking flat or wrinkled?
Steam or iron the panels before hanging, then train the folds by tying the fabric loosely for 24 to 48 hours after mounting. This sets the drape and gives the curtains a finished, intentional appearance.
Recommended
- Curtain Installation Guide: Achieve Perfect Window Dressing – Shop Designer Fabrics by the Yard | Curtains & Drapery
- Step-by-step curtain installation: the complete DIY guide – Fabric Store in Columbia, SC | Drapery Making Services
- DIY Curtain & Drapery Installation Guide – Fabric Store in Columbia, SC | Drapery Making Services
- Benefits of Readymade Curtains: a Practical Guide – Fabric Store in Columbia, SC | Drapery Making Services