
Master the window treatment design process: custom style
TL;DR:Precise measurements and clear goals are essential for successful custom window treatments.Material and hardware choices should align with specific needs for light control, privacy, and style.Early professional consultation and planning prevent common mistakes and ensure harmonious integration.
Window treatments that look perfect in a showroom can fall completely flat once they’re hanging in your home. The fabric feels too stiff, the panels are too short, or the light control is nowhere near what you expected. These disappointments are not random. They almost always trace back to skipped steps, vague goals, or rushed decisions made without a clear process. A structured, evidence-backed approach to planning, measuring, selecting materials, and installing your treatments is what separates a polished, custom result from a costly redo. This guide walks you through every stage so you can move forward with confidence.
Table of Contents
- Set your goals and take precise measurements
- Choose the right fabrics, linings, and hardware
- Design layers and consider special window types
- Install, style, and check your results
- Expert perspective: Why the perfect window treatment process always starts earlier than you think
- Bring your design to life with the right fabric and expert help
- Frequently asked questions
Key Takeaways
| Point | Details |
|---|---|
| Precise measurement matters | Accurate measurements and recording every detail are essential for custom-fit window treatments. |
| Material and layering choices | Fabrics, linings, and thoughtful layering directly impact style and room comfort. |
| Plan for special windows | Unique windows require creative solutions and custom planning for best results. |
| Expert help pays off | Professional guidance prevents costly mistakes and ensures harmony with your home’s design. |
Set your goals and take precise measurements
Before you look at a single fabric swatch, you need to know what you want your window treatments to accomplish. Defining clear objectives upfront keeps every subsequent decision focused and purposeful. Most homeowners find that their goals fall into four main categories:
- Light control: Do you need to block morning sun, filter harsh afternoon glare, or simply soften natural light?
- Privacy: How much visibility from the street or neighboring properties is a concern in this room?
- Energy efficiency: Are you trying to reduce heat loss in winter or block solar heat gain in summer?
- Style: What aesthetic are you working toward, whether that is relaxed and casual, formal and layered, or clean and minimalist?
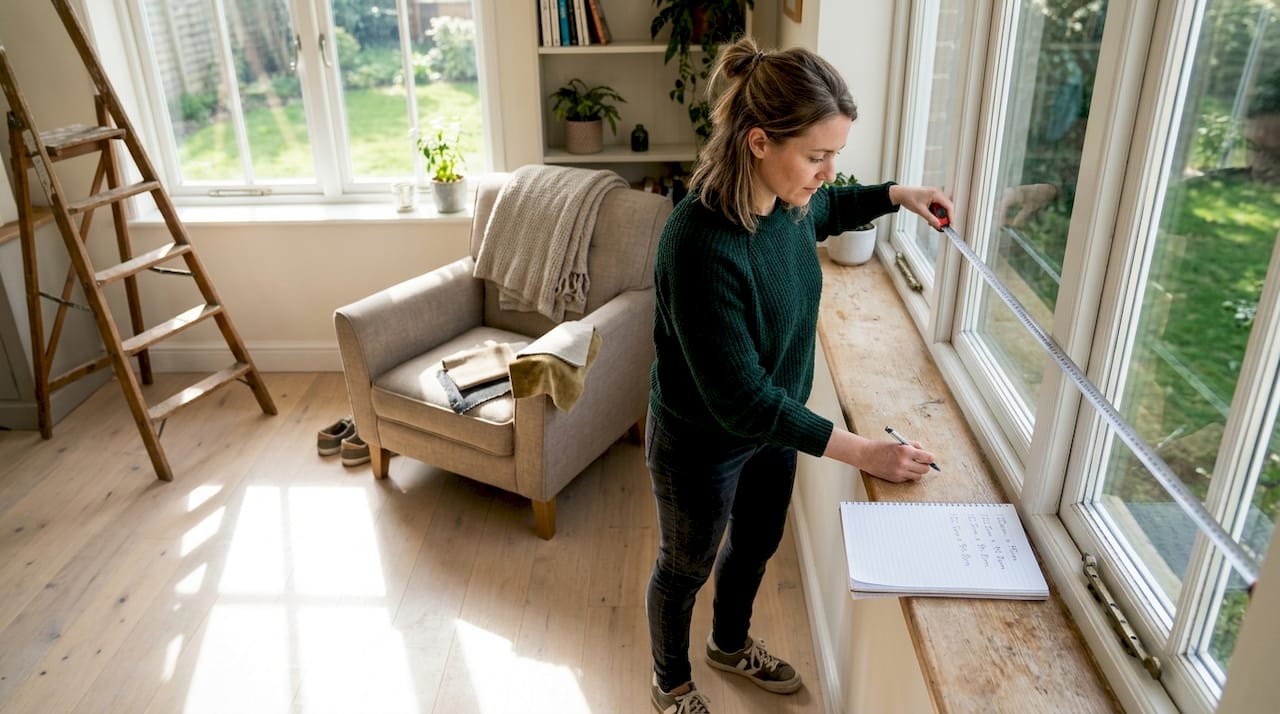
With your goals written down, measurements come next. Precise measurements must account for window architecture, rod placement, and ideal fullness for proper results. Use a steel tape measure, never a fabric one, and record every number to the nearest 1/8 inch.
Here is a quick reference for what to measure:
| Measurement | What to capture | Why it matters |
|---|---|---|
| Width | Outside frame edge to edge | Sets rod length and panel count |
| Height | Top of rod to floor or sill | Determines panel drop |
| Projection | Wall depth for rod bracket | Ensures clearance for panels |
| Rod placement | Distance above frame | Controls visual height of window |
Industry standards recommend placing rods 4 to 6 inches above the window frame and extending them 6 to 12 inches beyond each side. For fullness, most designers specify fabric that is 2 to 3 times the width of the window. This creates the gathered, luxurious look associated with custom treatments. Our DIY window installation guide covers these standards in practical detail for homeowners tackling the project themselves.
Pro Tip: Write your measurements in a dedicated notebook and verify every number at least twice before placing a custom order. A single transposed digit can mean weeks of delay and added expense.
Choose the right fabrics, linings, and hardware
With goals and measurements confirmed, the next decisions involve material and hardware. These choices shape both how your treatments perform and how they look for years to come. Fabric choice should be based on light control, privacy, insulation, durability, and aesthetic appeal, and no single fabric type excels at everything.

Use this comparison to match fabric and lining to your specific needs:
| Fabric type | Lining option | Best use case |
|---|---|---|
| Sheer (linen, voile) | Unlined or light interlining | Soft light diffusion, layering base |
| Blackout (woven, coated) | Blackout lining | Bedrooms, media rooms, nurseries |
| UV-resistant (solution-dyed) | Thermal lining | South or west-facing rooms |
| Thermal (heavy cotton, jacquard) | Thermal or flannel interlining | Cold climates, energy savings |
For hardware, follow this sequence:
- Choose the rod style first. Traverse rods work well for heavy panels; decorative rods suit lighter fabrics and exposed finials.
- Select brackets rated for your panel weight. Undersized brackets cause sagging and wall damage over time.
- Pick finials that complement your room’s hardware finishes. Brushed nickel, matte black, and antique brass are all strong choices in 2026.
- Consider motorization early. Motorized tracks are far easier to plan for during installation than to retrofit later.
Avoid tension rods for anything heavier than a sheer panel. They shift, bow, and rarely hold their position over time. Rod pocket headers are also worth reconsidering if you want easy operation; ripple fold or pinch pleat headers draw far more smoothly and look more refined. Pairing a sheer layer with a blackout option gives you the most flexibility across different times of day. Staying current with window treatment trends can also help you make choices that feel fresh rather than dated.
Pro Tip: When working with patterned fabric, align your pleat placement so the pattern repeats fall symmetrically across each panel. This detail alone elevates the finished look from standard to genuinely custom.
Design layers and consider special window types
Layering is one of the most effective tools in window treatment design, and it becomes especially important when you are working with non-standard windows. Layering is essential for irregular or oversized windows; some windows such as bay and arched styles require custom solutions that off-the-shelf products simply cannot provide.
Common window challenges and how to address them:
- Bay windows: Use individual rods for each section or a custom curved track to maintain a cohesive look without blocking the architectural detail.
- Arched windows: Stationary fabric panels or custom-shaped shades preserve the arch while adding softness.
- Oversized windows: Multiple panels on a continuous rod create the illusion of one grand treatment without requiring single pieces of unusually wide fabric.
- Corner windows: Wrap-around rods or two separate rods meeting at the corner both work, depending on how much overlap you want.
- Floor-to-ceiling glazing: Ceiling-mounted tracks give a clean, architectural finish that standard wall-mounted rods cannot replicate.
A layered approach typically combines sheer panels closest to the glass, a blackout shade or roller in the middle layer, and full drapes as the outermost frame. This system lets you adjust light and privacy independently throughout the day. Exploring layering design trends gives you a strong sense of how designers are currently combining these elements.
Important: If your home is part of a homeowners association, confirm exterior fabric color restrictions before ordering. Many HOAs require neutral or white linings visible from outside. For motorized systems in atypical window configurations, consult an electrician and your treatment installer at the same time to coordinate wiring and bracket placement before any drilling begins.
Early involvement of your lighting designer or architect, if you are mid-remodel, ensures that treatment layers work with both natural and artificial light rather than competing with them.
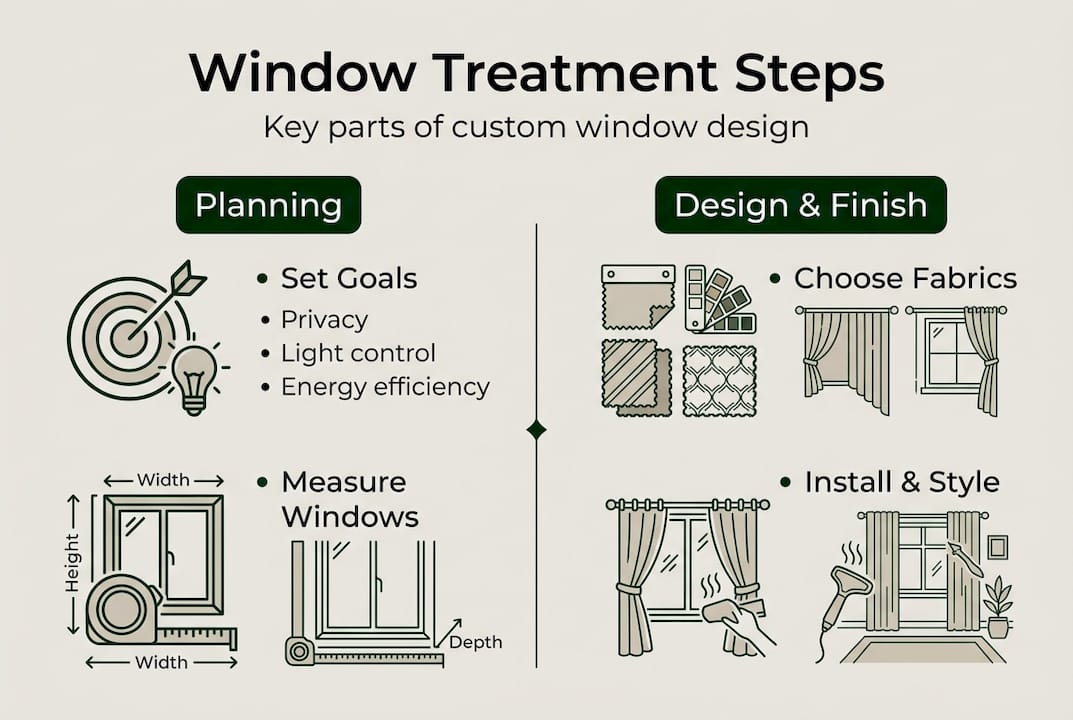
Install, style, and check your results
Careful installation is where planning either pays off or unravels. Hang rods high for visual height, avoid puddling except for intentional drama, and check everything before drilling to avoid the most common and most regretted mistakes. Follow this sequence for best results:
- Mark rod bracket positions using a level before drilling. Even a slight tilt becomes obvious once panels are hanging.
- Install anchors rated for your wall type. Drywall anchors differ from those needed for plaster or masonry.
- Hang the rod and check for level again before attaching panels.
- Attach panels and distribute fullness evenly. Spend time training the fabric into even folds by hand, then secure with soft ties for 24 to 48 hours.
- Check pattern alignment across all panels before finalizing. Misaligned prints are one of the most common complaints after installation.
- Set the hem length. For a floor-length treatment, aim for a 1/2 inch clearance from the floor for a tailored look, or allow 1 to 2 inches of gentle break for a softer effect.
- Test all hardware operation. Rings, gliders, and motorized tracks should move without resistance.
Common mistakes to catch before you call the project done: crooked rods that only become visible once panels are weighted, pattern repeats that don’t align at panel seams, and missing linings that were specified but not confirmed with the workroom. Our DIY installation tips address each of these scenarios with practical fixes.
Pro Tip: Photograph your finished windows from across the room and from outside the house. The camera catches asymmetry and alignment issues that your eye tends to overlook in person. Keep these photos on file for future reorders or repairs.
Expert perspective: Why the perfect window treatment process always starts earlier than you think
After working through hundreds of fabric selections and custom treatment projects, one pattern stands out clearly. The homeowners and designers who get the best results are not necessarily the ones with the largest budgets. They are the ones who started planning before the furniture arrived, before the paint went on the walls, and sometimes before the flooring was chosen.
Custom window treatments are rarely successful as an afterthought. When they are added at the end of a renovation or decoration project, they are forced to work around decisions that were never made with them in mind. The rod height conflicts with a light fixture. The fabric color fights the wall paint. The lining choice was not considered until the order was already placed.
Pro consultation in the design phase avoids common regrets and ensures harmony with the room’s architecture. Most issues we see trace back to vague initial goals or last-minute product choices made under time pressure. Getting professional advice on measurement and layering, even just once, nearly always pays off in the finished result. If you want to see how current design thinking approaches this integration, reviewing trending window treatments early in your process gives you a useful framework before decisions get locked in.
Bring your design to life with the right fabric and expert help
Having a clear process is valuable. Having access to the right materials and knowledgeable support makes the difference between a good result and a truly refined one. At Beautiful Window Elgin, we carry an extensive selection of professional-grade fabrics, from embroidered cotton to jacquard satin, sourced for both beauty and durability.

Whether you are sourcing a durable outdoor canvas fabric for a sunroom or porch treatment, or browsing our full range of designer fabrics by the yard for interior drapery, you will find quality materials and friendly design expertise in one place. Shop our fabric collection, request samples, or schedule a custom drapery consultation to take the next step with confidence.
Frequently asked questions
What is the best way to measure for custom window treatments?
Use a steel tape measure and record both width and height to the nearest 1/8 inch. Curtain fullness and rod placement require measuring beyond the window frame for a professional, custom look.
How do I choose between custom and ready-made window treatments?
Custom is the better investment for unusual window shapes, long-term durability, and a precise fit. Experts prefer custom for main living spaces because ready-mades rarely match in fit, materials, or longevity.
What are the current trends for window treatment design?
2026 trends favor fullness, rich textures, motorization, layered systems, and sustainable or natural materials that add warmth and visual depth.
Can window treatments improve my home’s insulation or energy efficiency?
Yes. Properly lined drapes with thermal or blackout linings reduce heat transfer significantly. Lining and layer selection directly impacts UV protection, thermal performance, and privacy in every season.
When should I consider professional help with the design process?
Consult a professional when windows are irregular, when you are mid-remodel, or when layering complexity increases. Professional consultation integrates treatments with architecture and avoids the most common and costly design regrets.
Recommended
- DIY Custom Window Treatments: Step-by-Step Guide – Fabric Store in Columbia, SC | Drapery Making Services
- Top window treatment styles: 32% energy savings proven – Fabric Store in Columbia, SC | Drapery Making Services
- Custom window treatments 2026: style meets smart function – Designer Fabrics by the Yard | Drapery Making Services
- Types of window treatments: Best picks for South Carolina – Designer Fabrics by the Yard | Drapery Making Services
- raamdecoratie kiezen stappenplan